In this article, we will guide you on generating QR codes for customers to scan and access the consumer app, managing your app banner and keywords, and customer’s checkout flow and retrieving orders.
Only available for Magento.
Generating your QR code to access PWA #
After installing PWA on your store backend, please follow these steps to generate QR code.
1. Open your store backend.
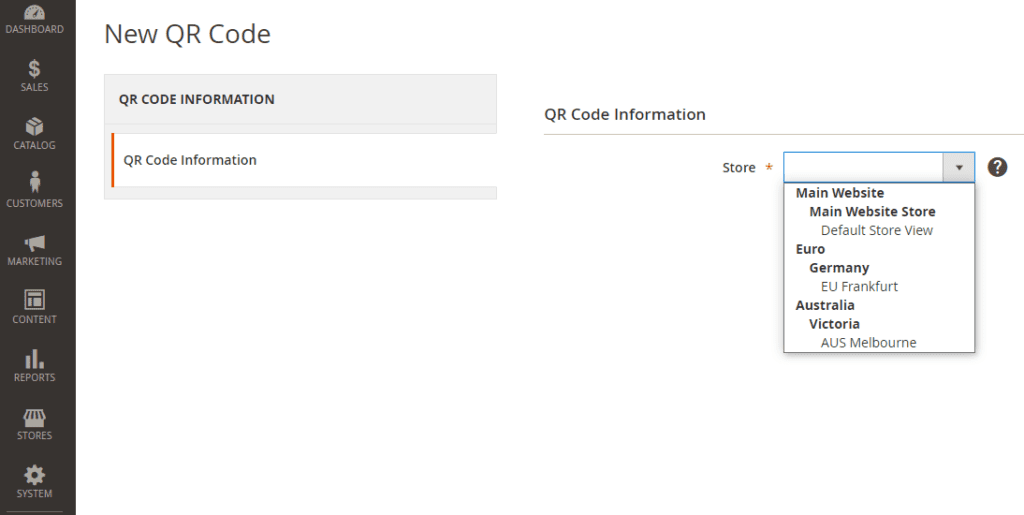
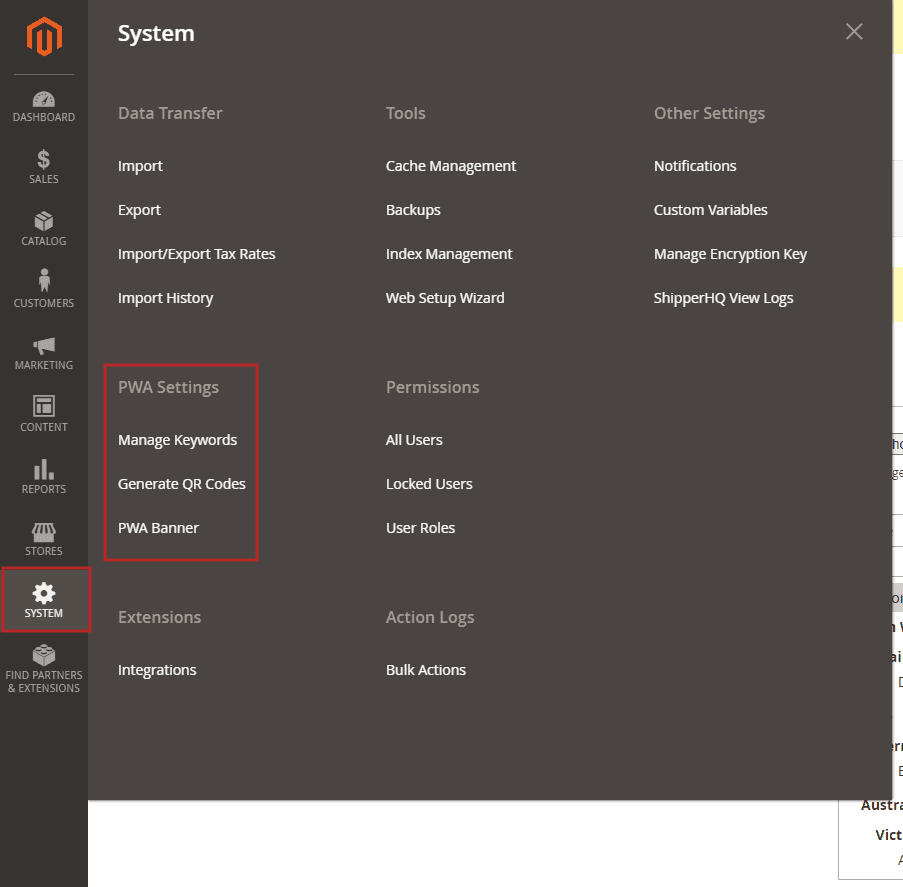
2. Navigate to SYSTEM –> PWA Settings –> Generate QR Codes.

3. Here, under QR Code Information, click on “Store” dropdown. Select the store you want to generate QR code for PWA.
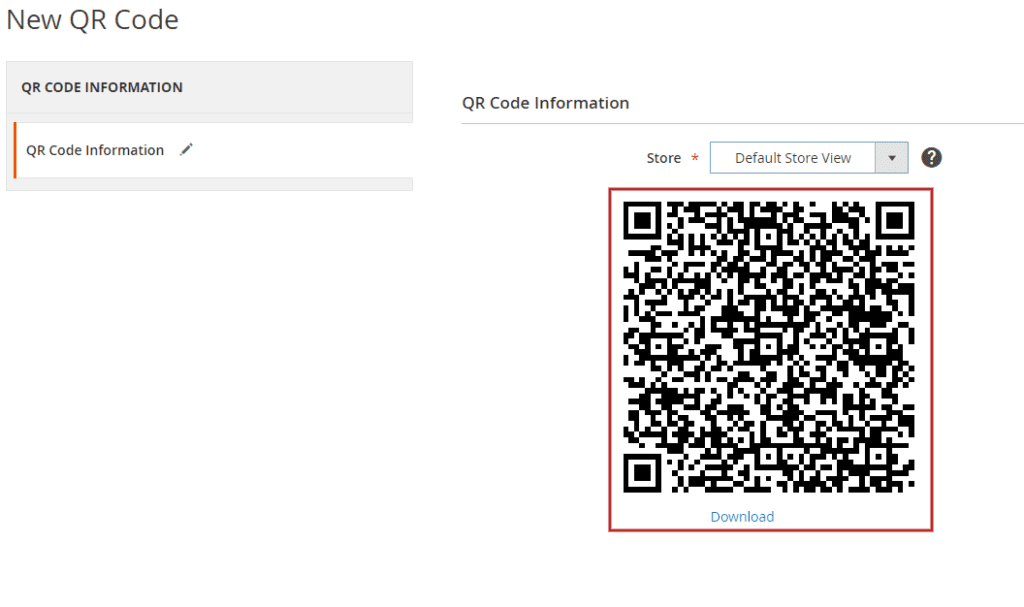
4. After selecting your store, the QR code for PWA will be generated. Customer can scan this code to access the consumer app.
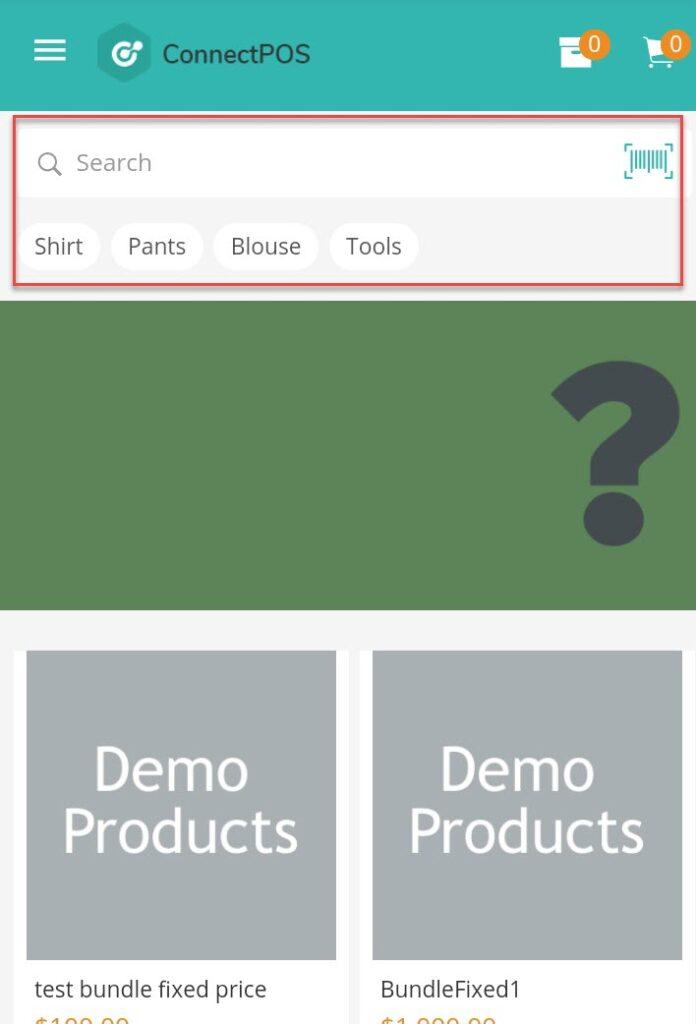
Managing Keywords on PWA #
To manage keywords to be shown on PWA, please follow these steps:
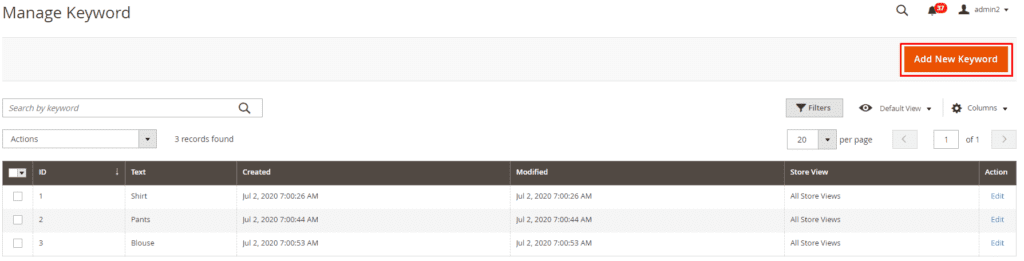
1. From your store backend, navigate to SYSTEM –> PWA Settings –> Manage Keywords.
2. You will be redirected to Manage Keyword page. Click on “Add New Keyword” to create a keyword.
3. Input your new keyword in the “Text” field. Then select which store you want this new keyword to appear in.
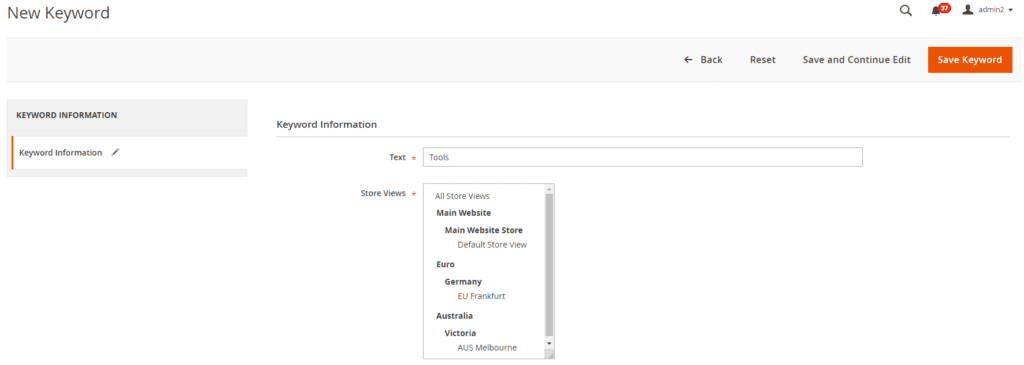
4. Click on “Save Keyword” to finish adding the keyword.
5. This keyword will now appear on PWA of the selected store. This keyword can be used to search for products.

6. To edit or delete the keyword, simply go back to “Manage Keyword” page on your backend, and edit it there.
Managing Banner on PWA #
To add and edit your banner on the PWA, please follow these steps:
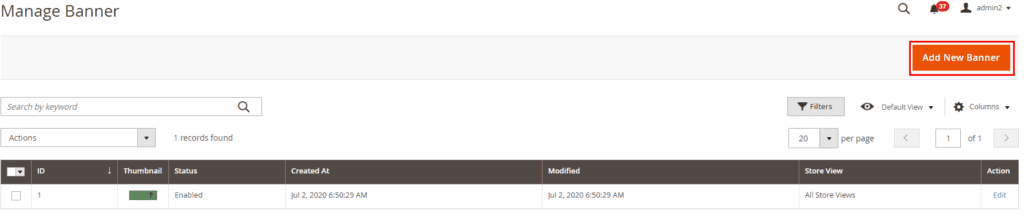
1. From your store backend, navigate to SYSTEM > PWA Settings > PWA Banner.

2. At the “Manage Banner” page, click on “Add New Banner” to start adding banner.
3. You will be redirected to “New Banner” page. In here you can:
– Upload your banner image. Allowed types are: jpg, jpeg, gif and png.
– Set your banner status: Enable – Disable.
– Select store to show the banner.
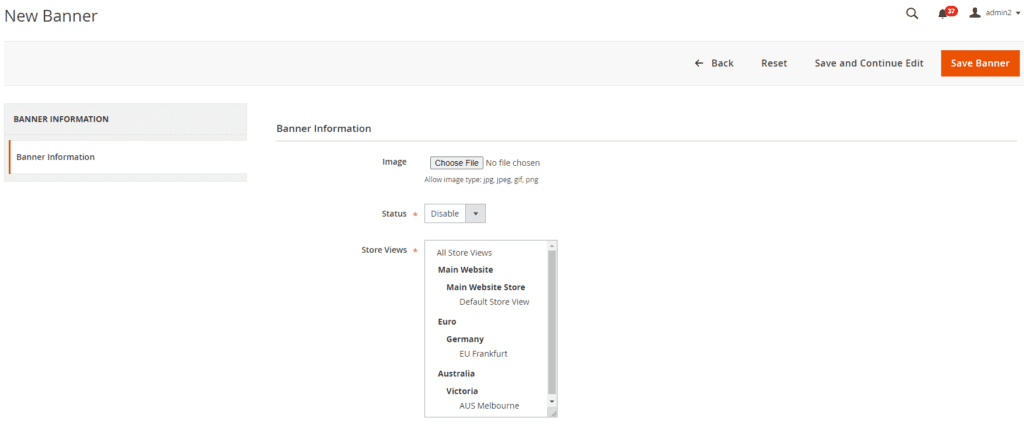
4. Click on “Save Banner” to create the banner.
5. The banner will now appears on your PWA, as a slider.

6. To edit, or delete the banner, simply go back to “Manage Banner” page, and edit it there.
Settings for PWA front-end #
To manage the front-end of PWA, please follow these steps:
1. From your store backend, navigate to STORES –> Settings –> Configuration –> ConnectPOS –> PWA.
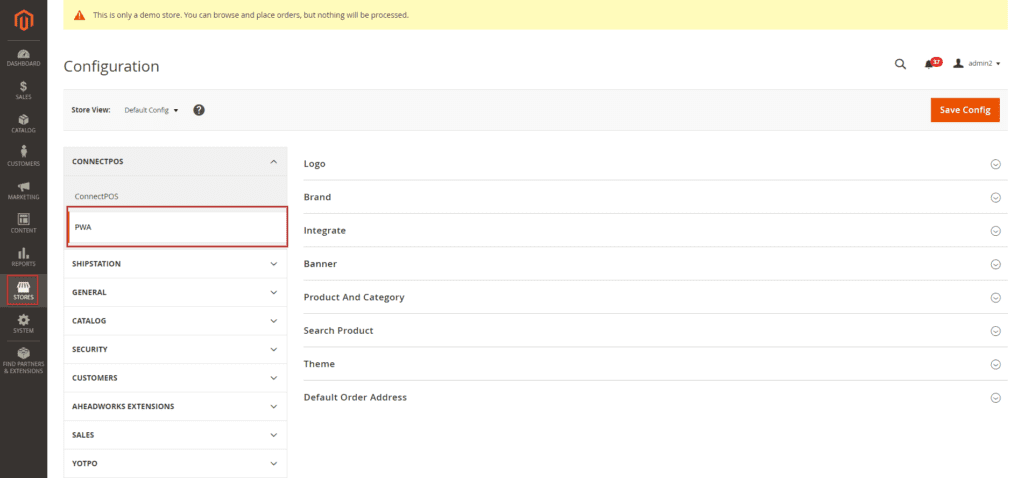
Here, you can edit the following configs for PWA front-end:
Logo: Logo image for to be shown on PWA. You can delete and switch logo image here.
Brand: Setup your Brand Name to be shown on ConnectPOS.
Integrate: To add Reward Points and Gift Card integration on PWA during customer’s checkout process. ConnectPOS is partnered with AheadWorks.
Banner: Set the number of active banners on your PWA.
Product and Category: To set what products and categories to be shown on PWA, based on visibility, stock and status.
Search Product: To set what attributes to be used for search product on PWA.
Theme: Set theme color on your PWA.
Default Order Address: The default address to setup your orders.
Checkout flow for customer on PWA #
Customer can start placing order on PWA following these steps:
Customer scan the generated QR code on their SmartPhone, opening the Consumer App using their browser.
Customer search for products using keyword or search field, or using the scanning feature on their phone to scan product barcode.
To add a product to cart, customer click on a product to view product detail, select options (if available), then click on “Add To Cart“.
Customer may also click on the heart icon to add product to wishlist.
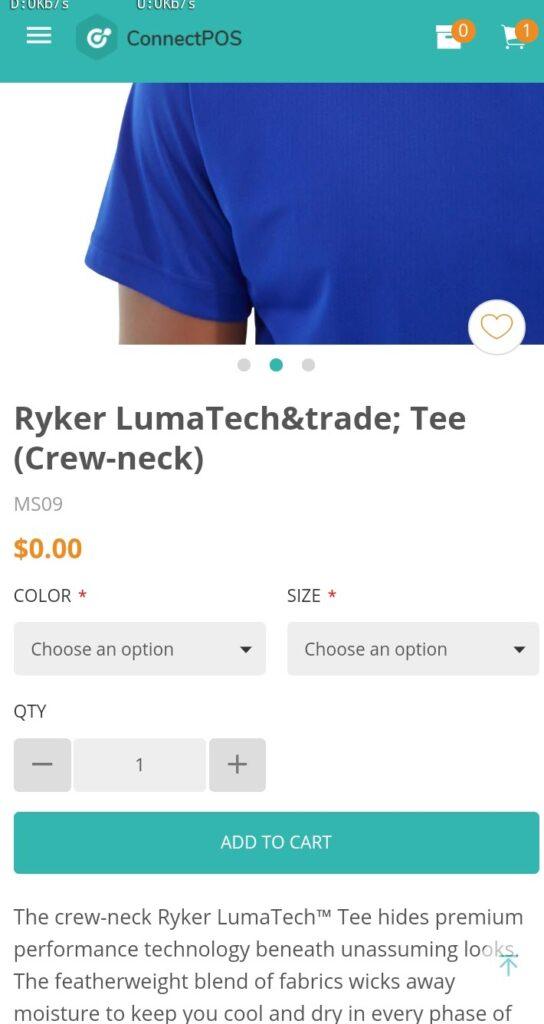
After adding product to cart, customer click on the cart icon (top right) to see their current cart.
– Customer can also add notes to individual item in cart and edit items from cart.
– Click on “Checkout” to start the checkout process.

At the checkout screen, user can select payment for orders, available payments are Cash, Promo code, Gift Card / Reward Points (Make sure to enable from backend), PayPal.
Click on “Summary” to see the order summary
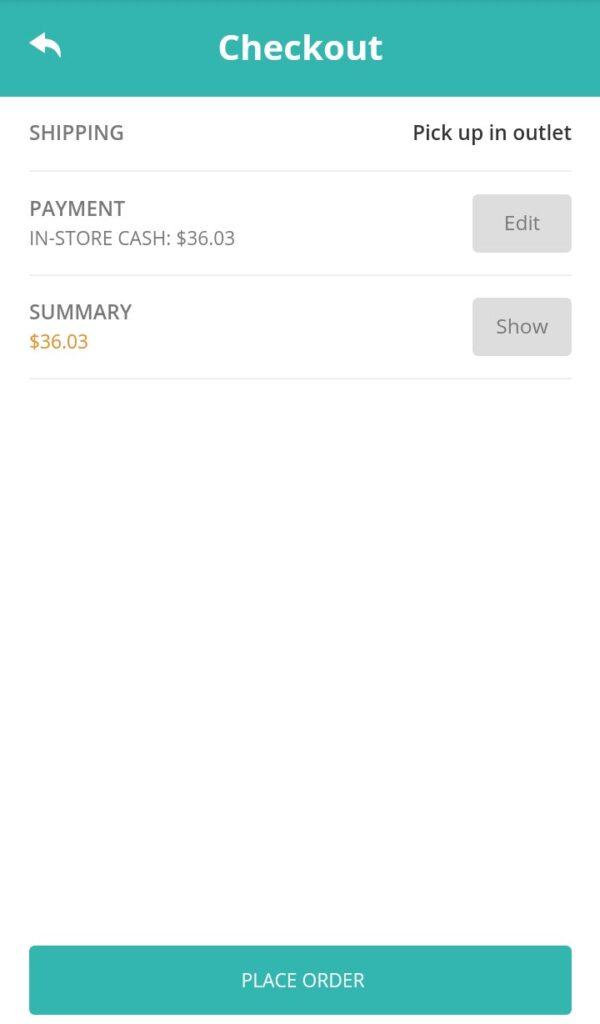
Click on “Place Order” to create order.
After creating the order successfully, click on the icon on the top right of the screen, next to the “Cart” icon to see customer’s picklist.
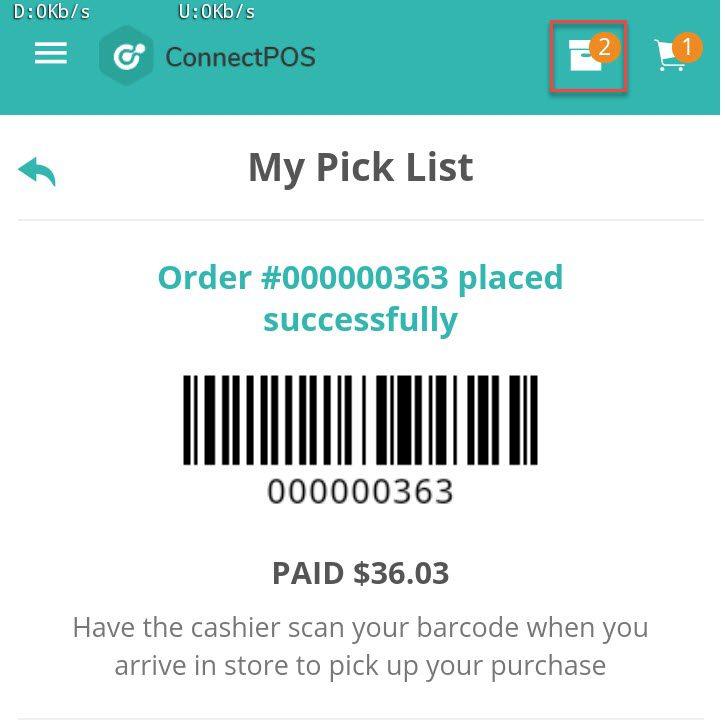
All orders to be picked by customer will be shown here.
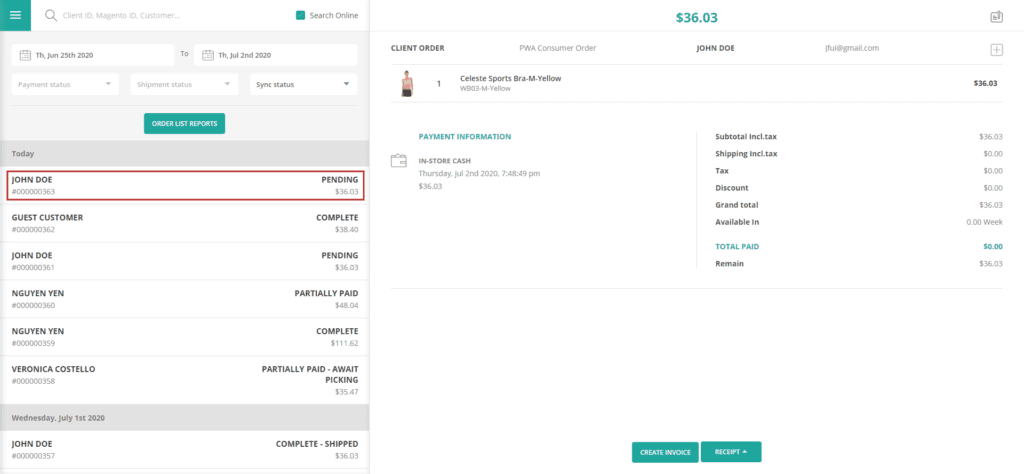
Customer will show the cashier this barcode and order ID, and cashier will take care of the rest on ConnectPOS.