Accessing Sell Screen #
To access ConnectPOS Sell Screen for the first time, please follow these steps:
Login to ConnectPOS using your username/password.
Select your store website.
Find your outlet, then click on your register.
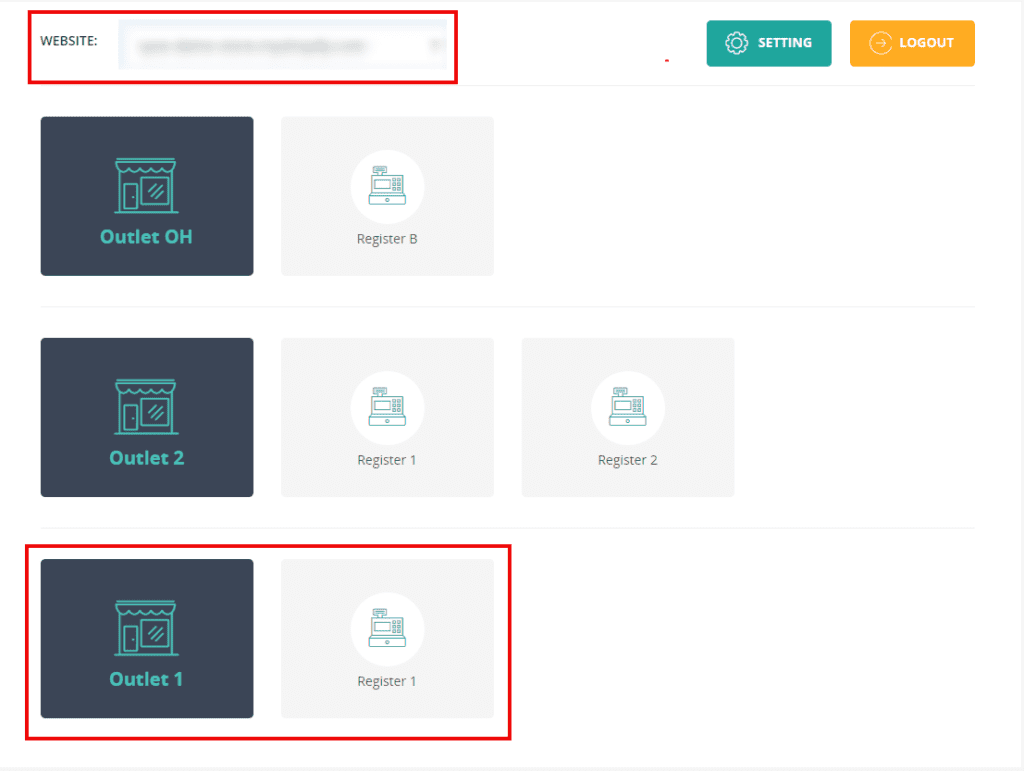
After selecting your register, you will be redirected to “Sell Screen“.
If you already logged in and open Sell Screen before, ConnectPOS will automatically load the selected register Sell Screen.
To access Sell Screen when you’re already logged in:
Click on the burger menu icon. Click on “Sell Screen“.
Sell Screen – Cashier Interface #
On the Sell Screen, you will see the following sections:
For the top section:
- Burger menu icon: Click here to open the side menu.
- Search field: Input search keywords here to filter products.
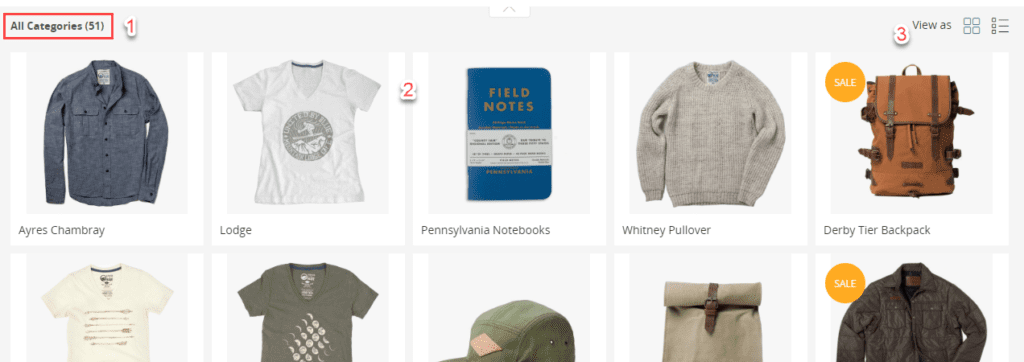
- Category section: List all categories created in your stores.
- “Custom Sale” icon: Click here to start adding custom sale product to cart.
- “Shipment” icon: Click here to start adding shipment to your order. Only available if there’s a product in the cart.

Top Section
For the bottom section:
- Breadcrumb: Breadcrumb section, default is the original category.
- Product Listing: Show your products here. Product list will depend on your warehouse, and product filters.
- “View as” toggle: Allow you to switch product listing between Grid view and List view.
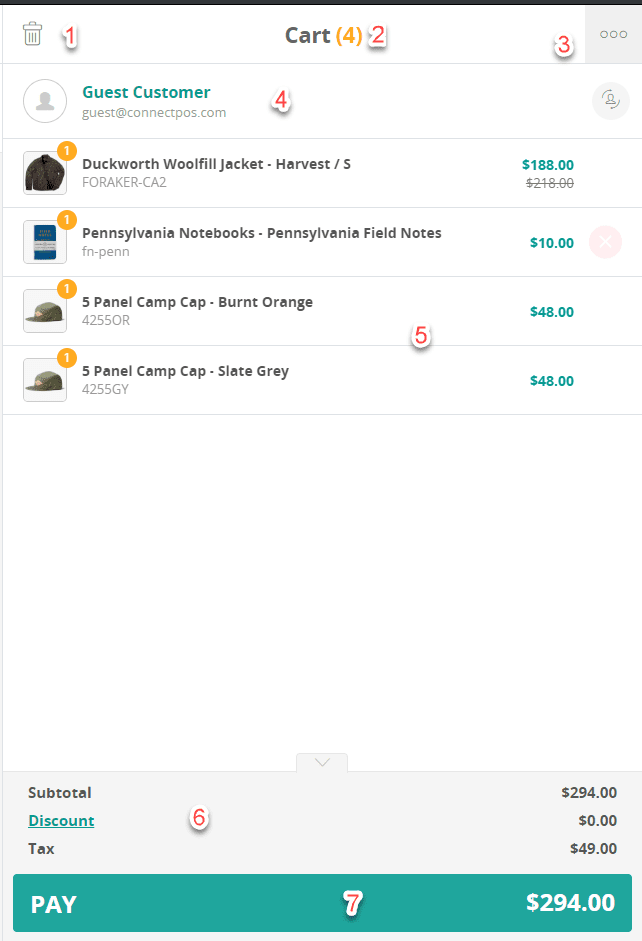
The right section is the Cart:
1. “Clear Cart” icon: Allow you to clear the cart completely.
2. Cart item count: Show the total number of product in your cart.
3. Additional cart actions:
– Add Note: Add note for the order.
– Retrieve On-Hold Orders: retrieve save order(s).
– Save Current Cart: Save the cart, you can retrieve this cart then checkout on later dates.
4. Customer section: Allow you to add the customer to cart, or uses the Guest customer.
5. Product list: List all added products. You can edit product quantity, price and apply the custom discount here.
6. Cart Summary: Pricing Summary of your current cart. You can add coupon code and custom discount here.
7. “Pay” button: Click here to complete adding products to cart, proceed to the payment screen.