Table of Contents
Step 1: Install the “ConnectPOS” plugin on your WooCommerce store #
Please follow these steps to install the ConnectPOS plugin on your WooCommerce store:
- Login to your WooCommerce admin store
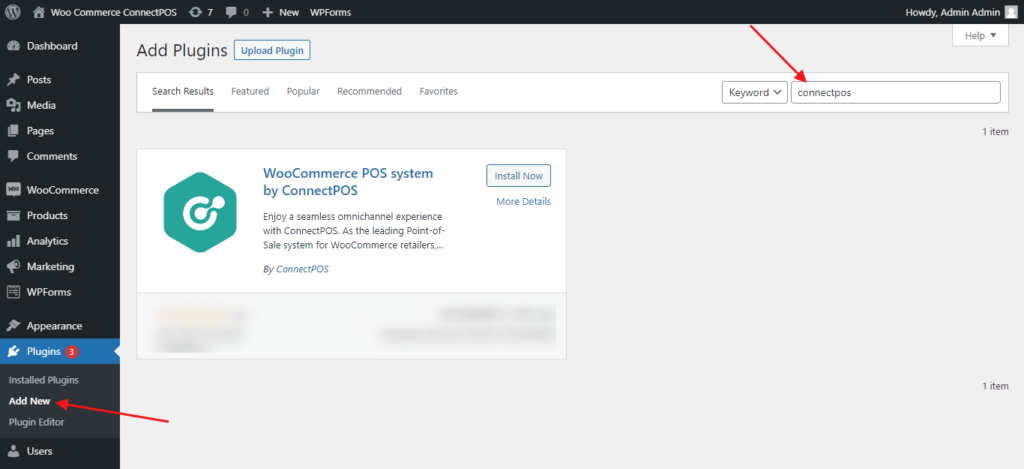
- Navigate to Plugins > Add New.
- Search for the plugin using keyword: “connectpos“.
- Click on “Install Now“.
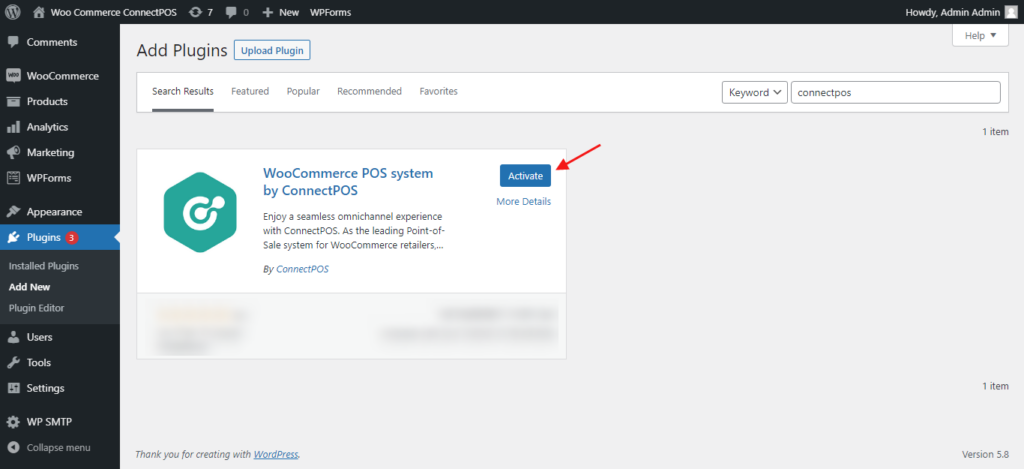
- Wait for installation.
- Click on “Activate Now” to finish installing the plugin.
Step 2: Generate Rest API keys #
Before adding a WooCommerce store to your ConnectPOS account, please follow these steps:
- Login to your WooCommerce/WordPress admin store.
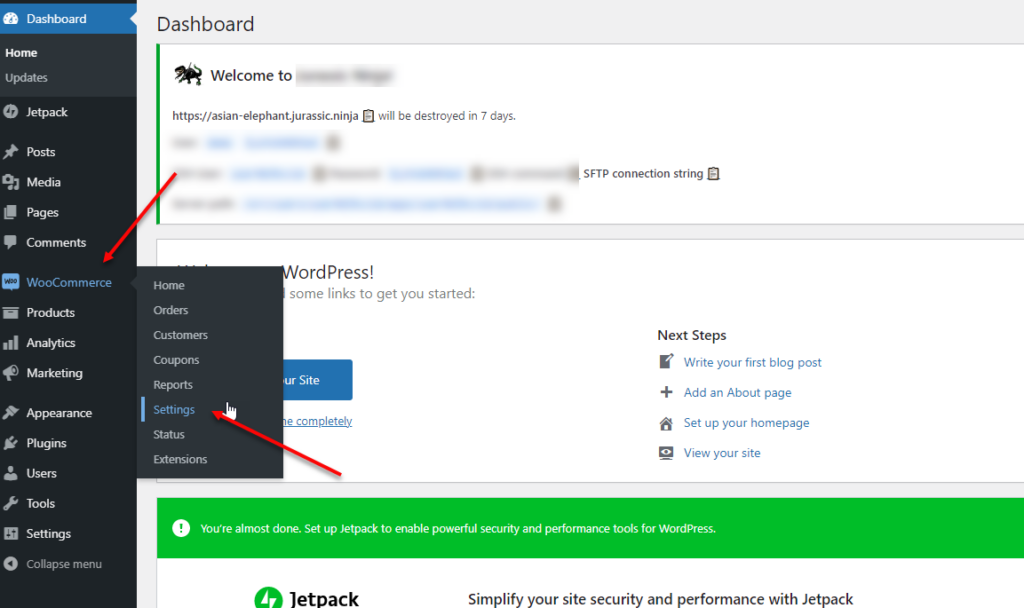
- Navigate to WooCommerce > Settings from your navigation bar.
- Navigate to Advanced > Rest API
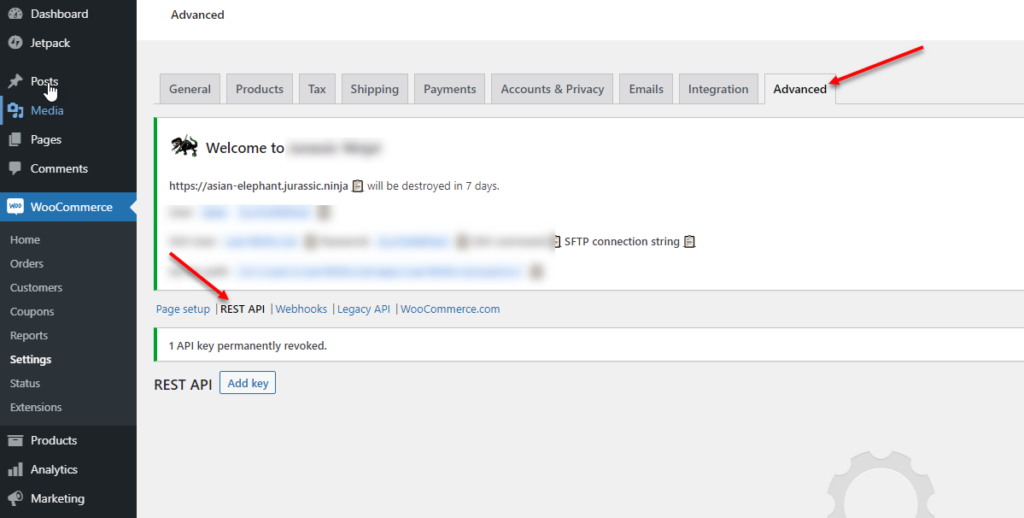
- Click on “Add Key“, or “Create an API Key“.

- Input a description for this key.
- Select an user.
- Set permission option to “Read/Write“.
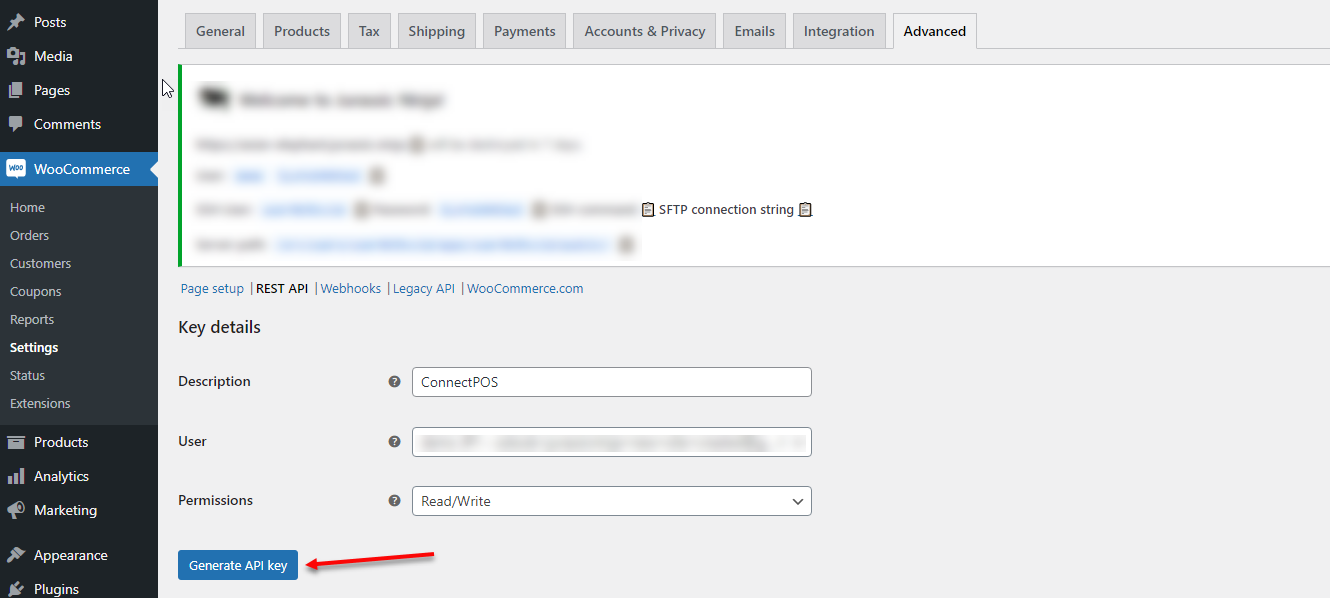
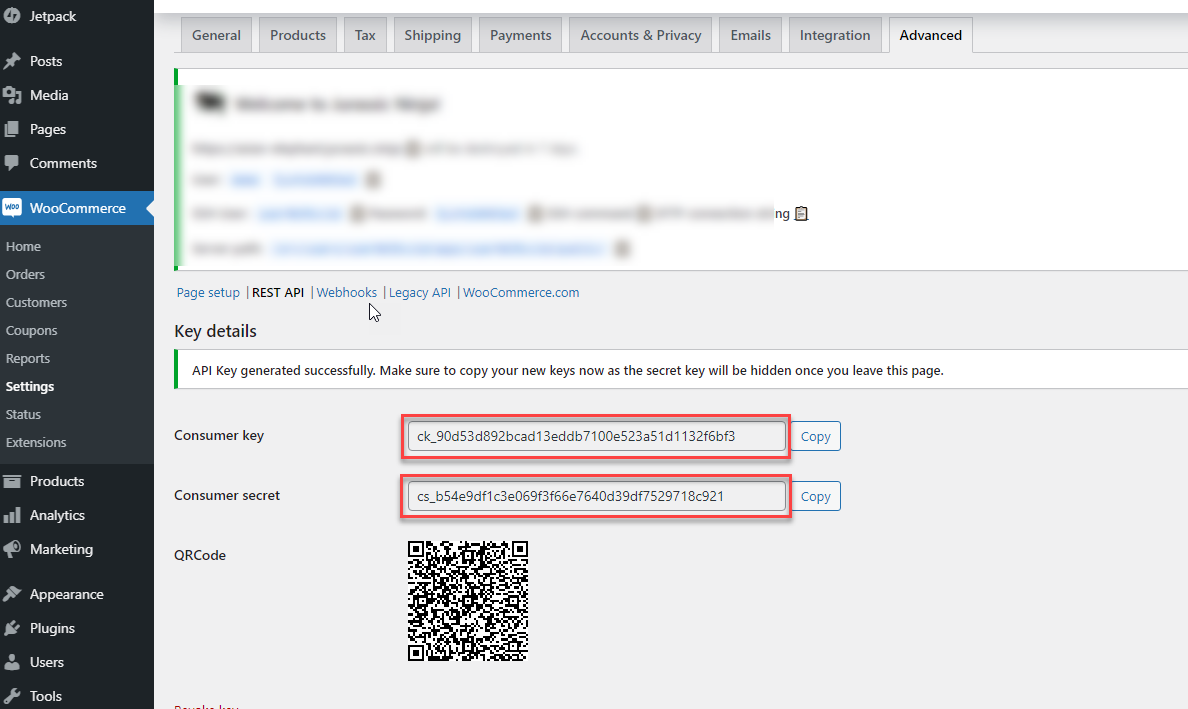
- Click on “Generate API key” to generate the API keys.
- 2 API keys will be generated. Please remember to make a copy before closing this page, you won’t be able to view those keys again.
Step 3: Adding WooCommerce store to your ConnectPOS account #
To use those API keys and add a WooCommerce store to your ConnectPOS account, please follow these steps:
- Open the account management site for ConnectPOS here.
- Login using your ConnectPOS account.
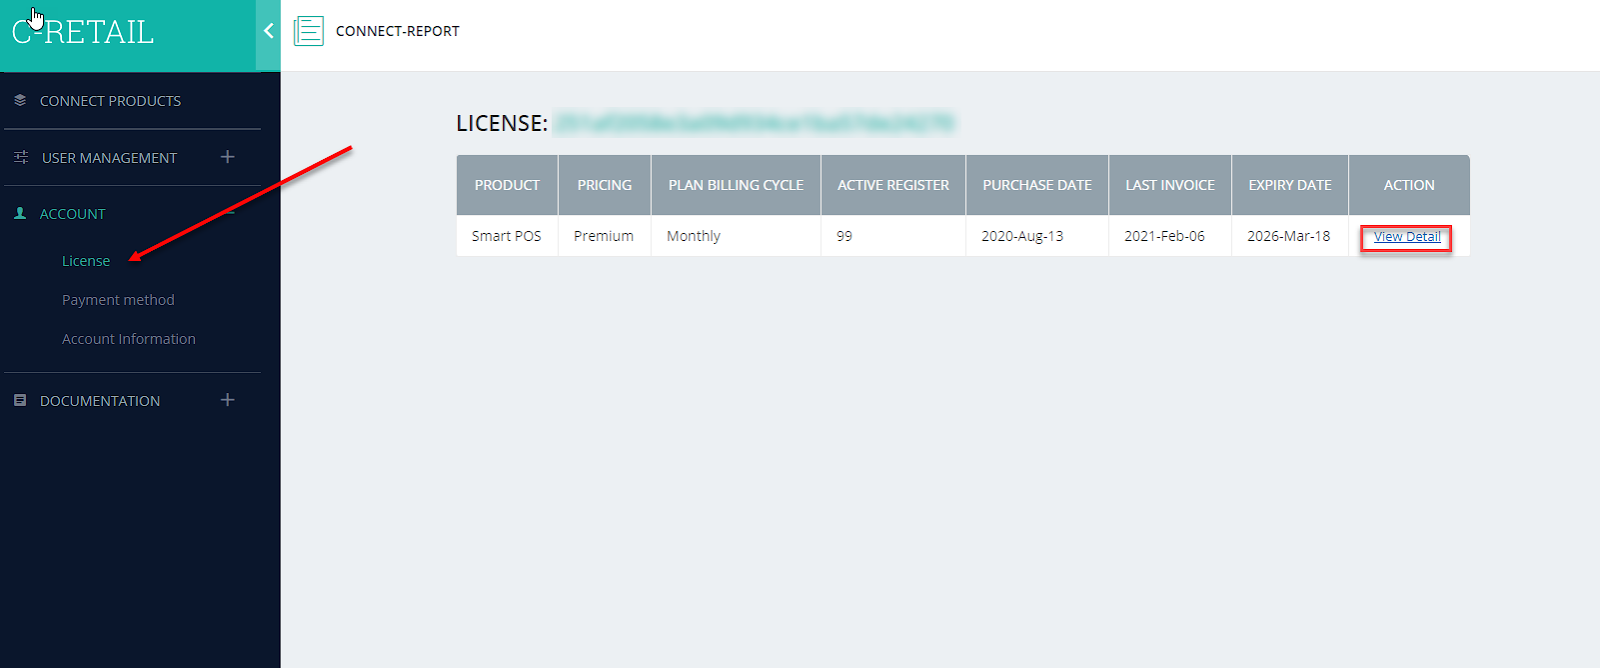
- Open the Side Menu, navigate to Account > License.
- Click on “View Detail” on “Smart POS” product row.
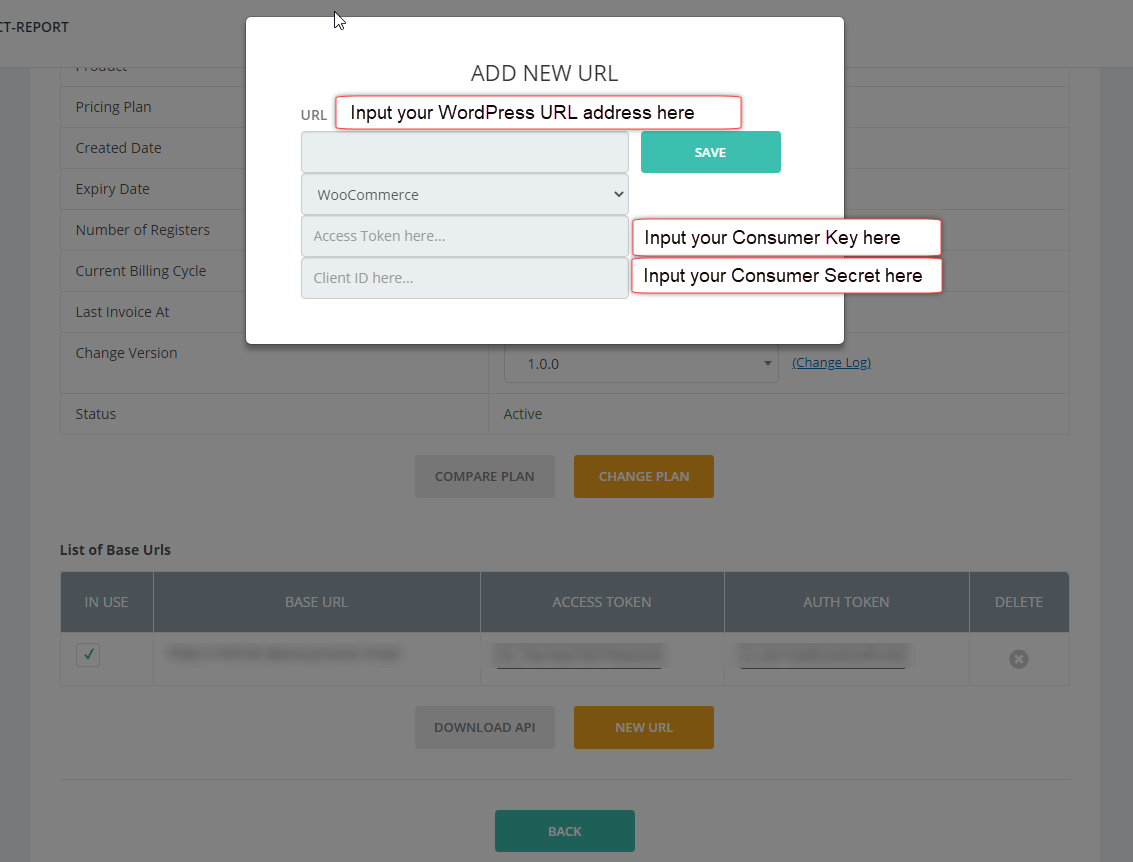
- From “General” tab, click on “NEW URL“.
- A popup will appears:
- Input your WordPress url.
- Select ecommerce type: WooCommerce.
- Input your Consumer Key.
- Input your Consumer Secret.
- Click on “Save“.
- The WooCommerce store will be assigned to your ConnectPOS account after saving.


