Creating a new outlet #
An Outlet is a location from which your products and items are sold, and orders are processed. Simply, an outlet is your physical store. On this page, you will be guided to create your own outlet on ConnectPOS.
To create a new outlet, please follow these steps:
Login on ConnectPOS.
Select your website.
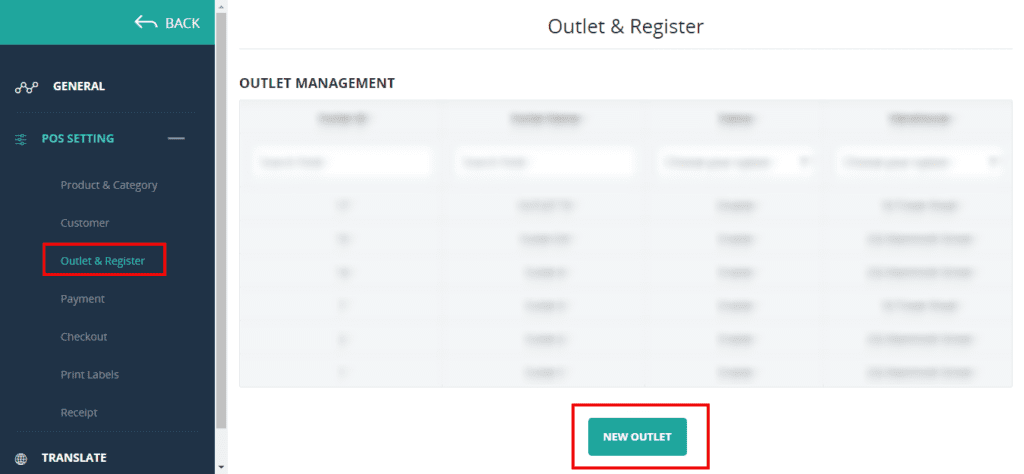
Click on the “Manage Outlets” button.

You will be directed to Outlet & Register.
Click “New Outlet” to start creating an outlet.
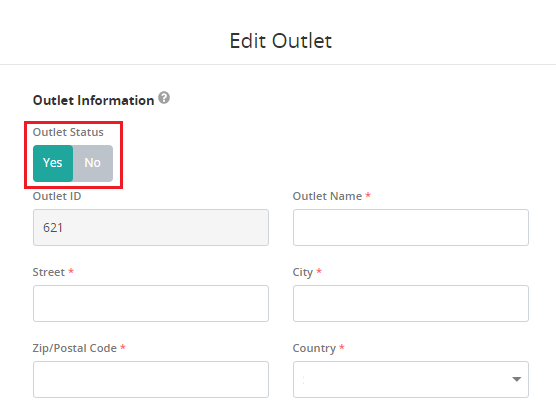
In the “Outlet Information“, input the following information:
- Outlet Status: Toggle to enable/disable your outlet.
- Outlet Name: Your outlet name.
- Street: Your outlet’s street address.
- City: Your store’s city location.
- Zip/Postal Code: Your store’s location zip code.
- Country: Dropdown, select your outlet’s country location.
- Telephone: Your store telephone number.
- Region: Input your location’s Region name or State name.
Depending on your country, this field will be either an input field, or a dropdown.
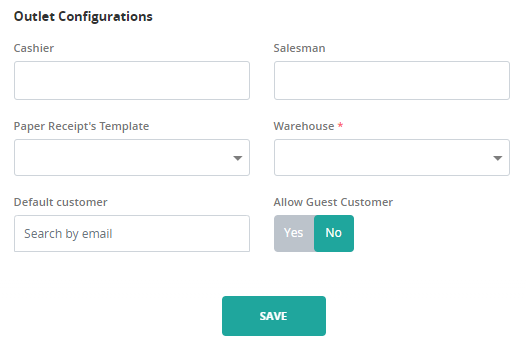
In the “Outlet Configurations” section, input the following information:
“Cashier” and “Salesman“: Select the people in charge of the transactions.
“Paper Receipt’s Template“: Select a receipt template for your outlet. A default template will always be available.
“Warehouse“: Select your warehouse. Products on Sell Screen will follow the warehouse’s inventory.
“Default Customer“: Seach customers by email
“Allow Guest Customer“: Depending on your store:
– Enable: Allow you to make sales with unregistered customers.
– Disable: To create a sale, you must select a customer for your order.
Click on “Save” after all necessary information is filled in.
Your new outlet will be created after these steps.
Click here for a detailed tutorial on adding your register.
Update your outlet’s information #
Note: To avoid conflict of data, ConnectPOS disallow changing the outlet’s information while you’re opening a register. To update the outlet’s data, please click on Setting > Change Outlet while you’re in Sell Screen.
If you wish to update your outlet’s setting, please follow these steps:
Click on Manage Outlets (as above)
Select the outlet you wish to update on the list.
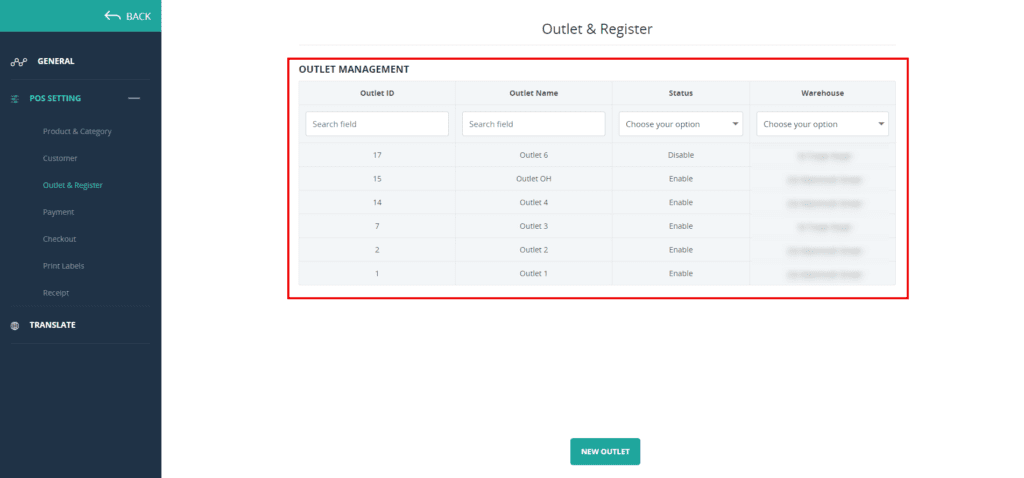
You can then update your outlet’s information as needed.
Click on “Save” to finish updating your outlet.
Disable an outlet #
To disable an outlet, please follow these steps:
Click on Manage Outlets.
Select the outlet you wish to disable.
In the “Outlet Information” section, change “Outlet Status” to “No“.
Click on “Save“.
The outlet will be disabled. To enable it again, simply re-do the above steps, but change “Outlet Status” to “Yes“.
Deleting an outlet #
ConnectPOS does not allow deleting an outlet, you can only disable it.


