Table of Contents
Default Template #
After integrating your website with ConnectPOS, a default receipt will be created when you first open the POS.
Please note that you can still update this template to your liking.
Creating & Customizing Templates #
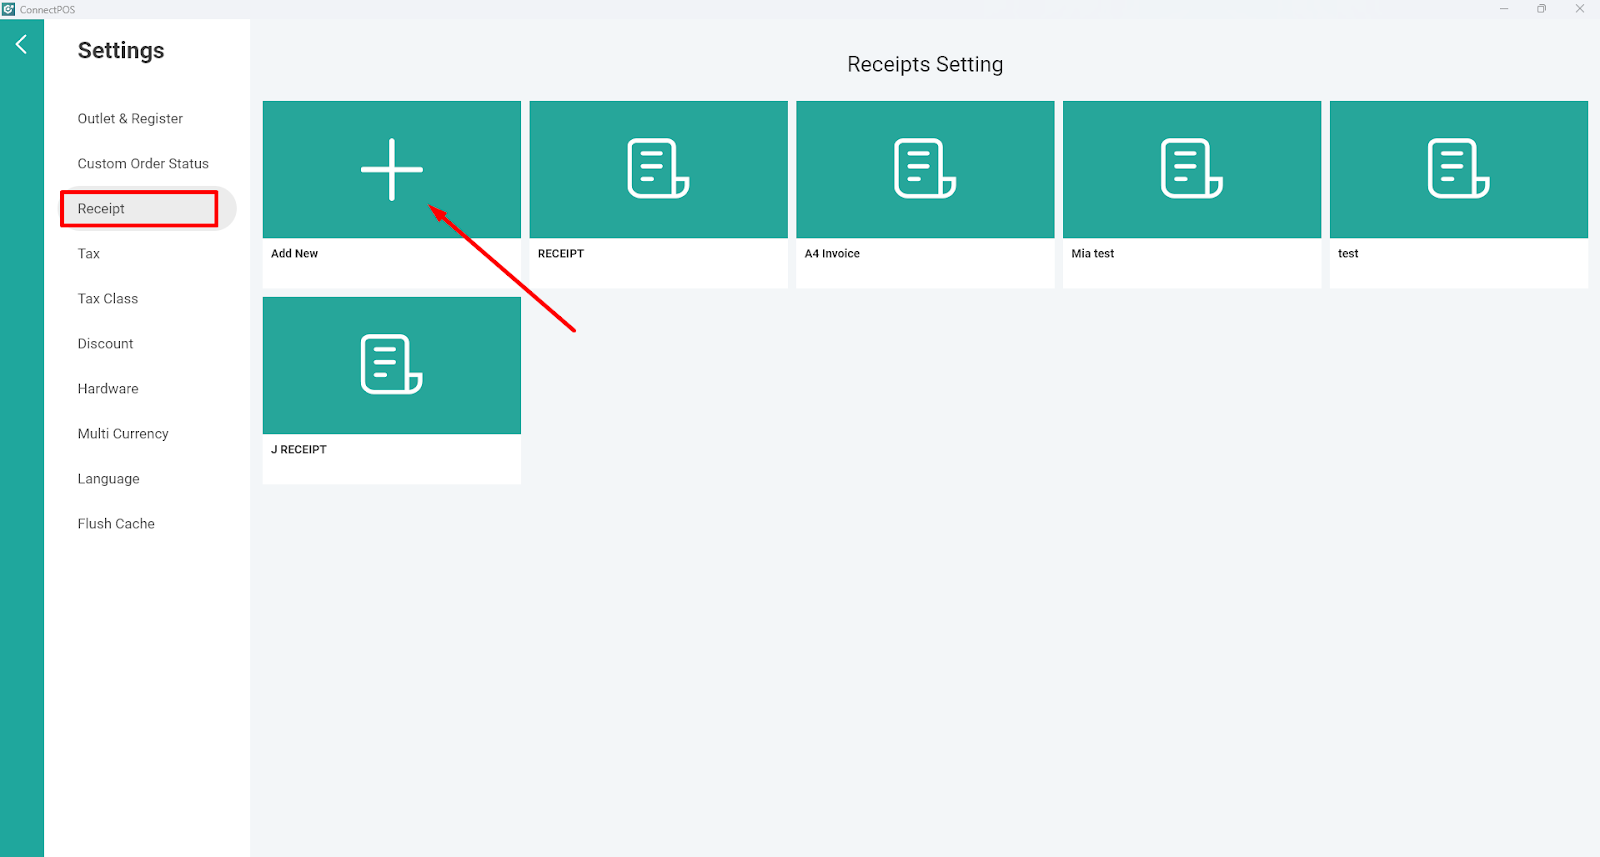
To create a new receipt template, please follow these steps:
Open ConnectPOS > Manage > Receipt > Click on “Add New” button > Select your size.
Template Customization:
- Company Info: Show your company’s information on the receipt (Address and Phone number).
- Header Logo: Toggle, allowing you to enable/disable receipt header logo.
- Logo URL: Put your logo image url here.
- Header Align: Choose how your header will be displayed, with the option to adjust Title and Title Alignment.
- Order Information: Show additional information about the orders as below:
- Customer Info: Show your customer’s email and phone number on the receipt, available options are:
- Show email and phone number.
- Show email only.
- Show phone number only.
- Don’t show email and phone number
- You can also customize other relevant information. Some other additional options are:
- Show Date & Time label
- Show order ID instead of order number
- Sales person
- Shipping address
- Top category
- Discount per item
- Row total include tax
- Subtotal include tax
- Show unit price of items
- Show discount, shipment amount if they’re zero
- Show tax amount equal to 0
- Show Signature: Toggle, show the area for your customers’ signatures.
- Footer: Footer text on your receipt.
- Order Barcode: Toggle, show order barcode on receipt.
- Show Digit Code: Toggle, show numbers of the barcode.
- Barcode Symbology: Your barcode symbology type. Supported format are:
- Code128 Auto
- Code128A
- Code128B
- Code39
- MSI Series.
- Footer image: Toggle, show your logo image on footer of receipt.
- Image URL: Your footer image URL.
- Powered Text: Show ConnectPOS Powered Text on your receipt.
- A new receipt draft will be created.
- On the right of the customization list will be a receipt preview. Any customized you make will be updated on the preview.
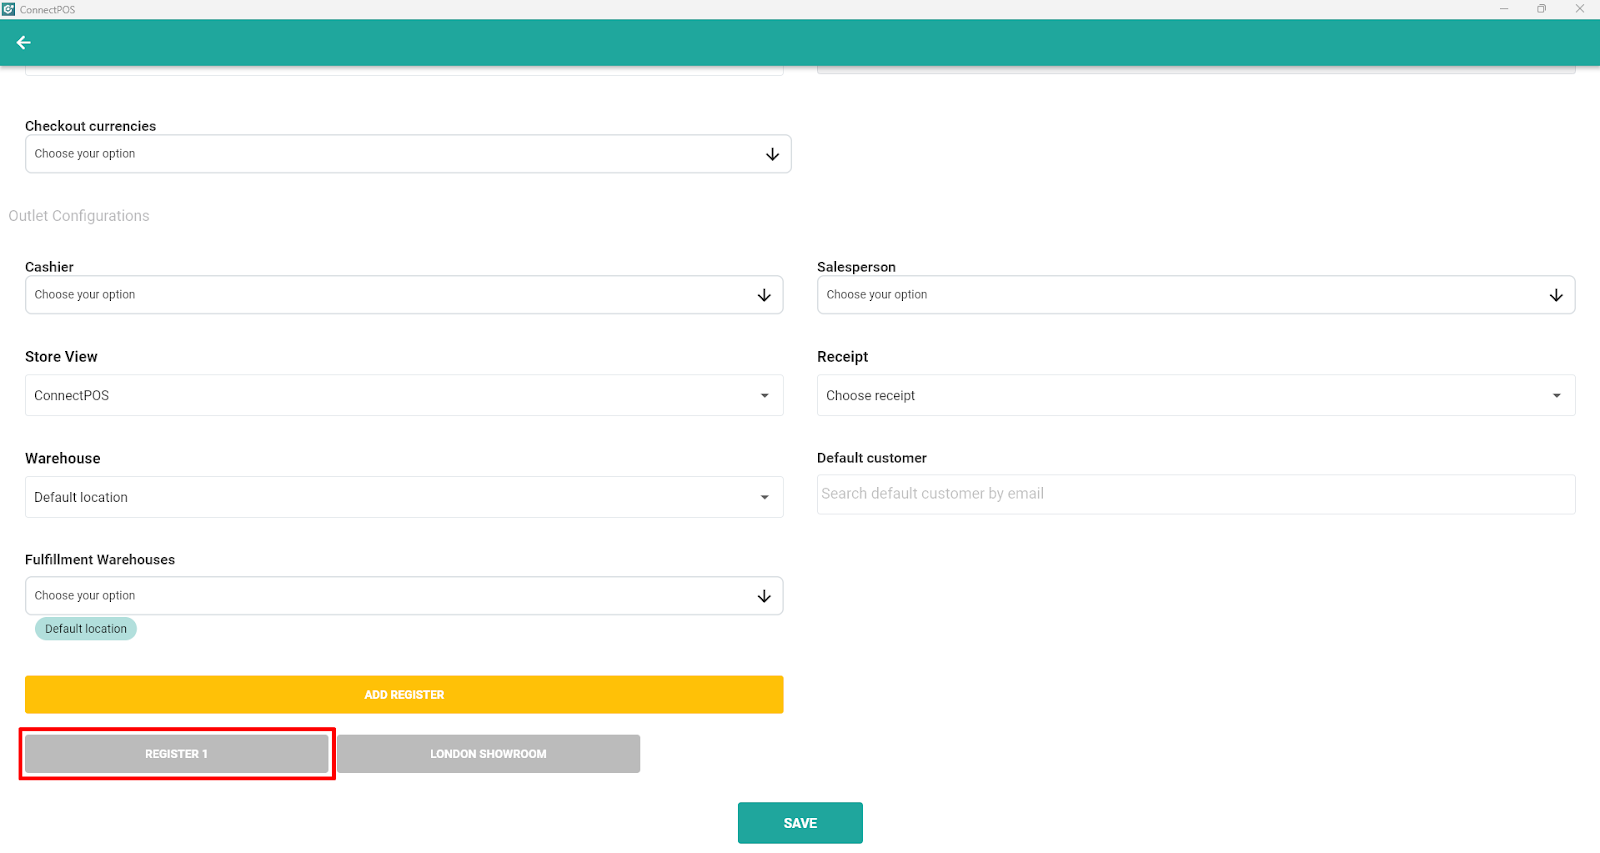
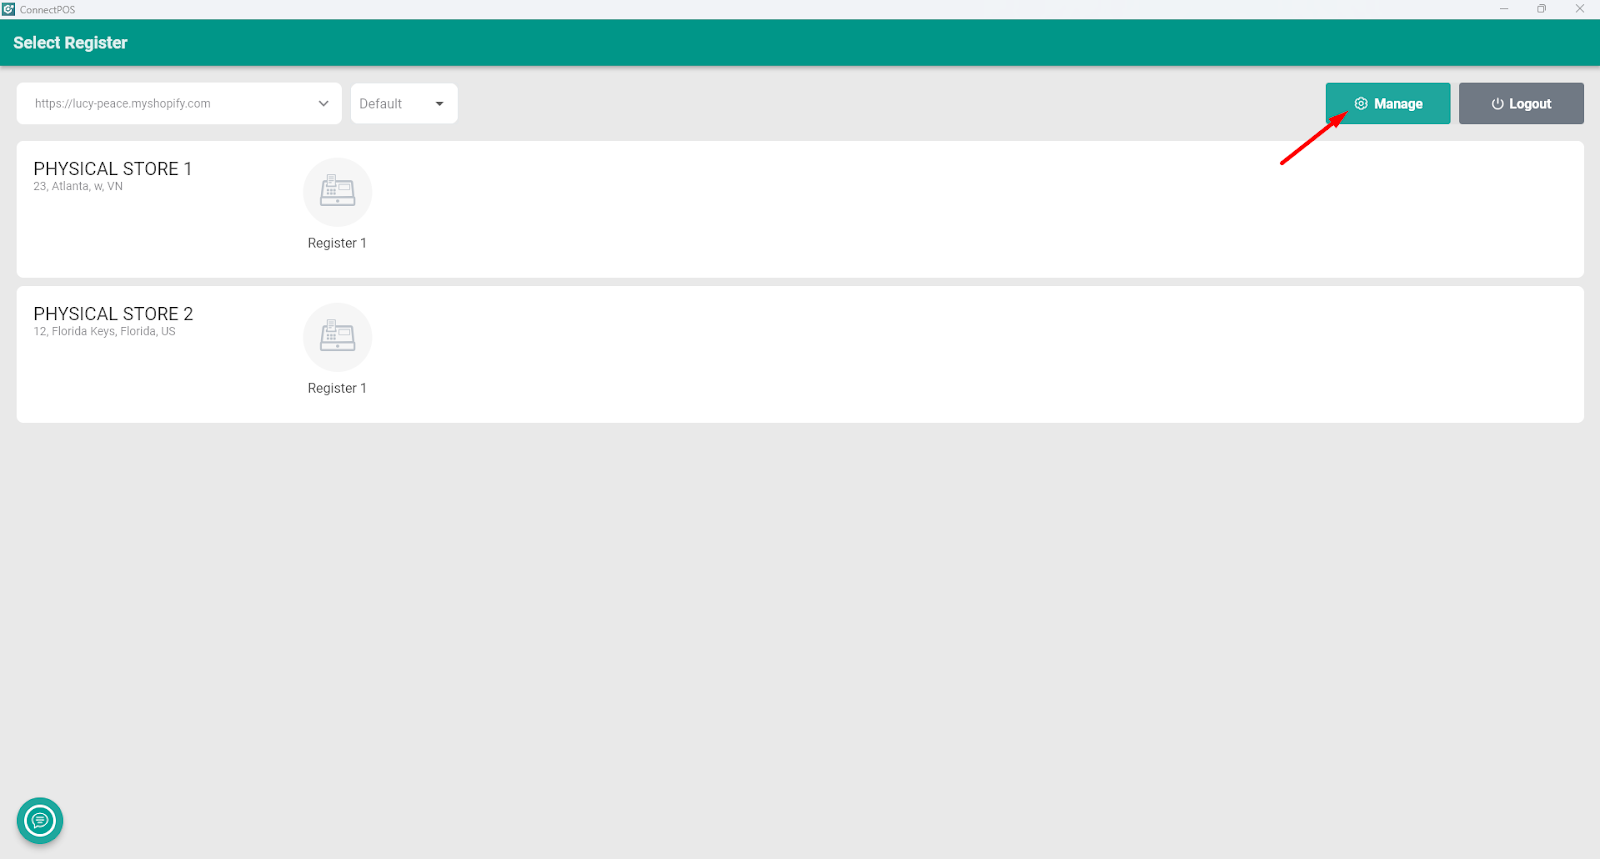
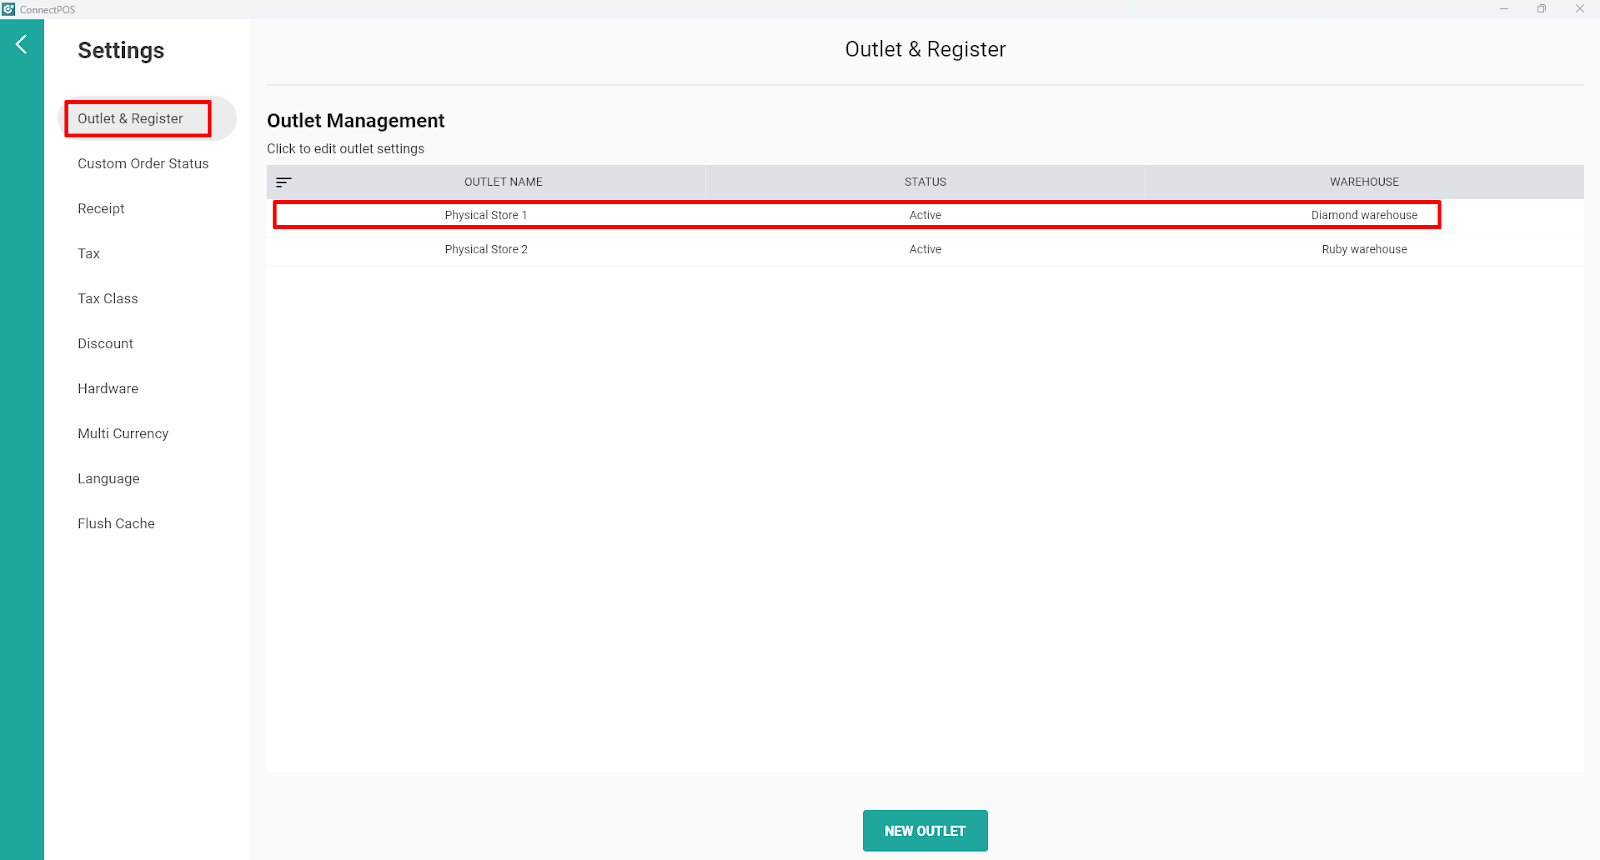
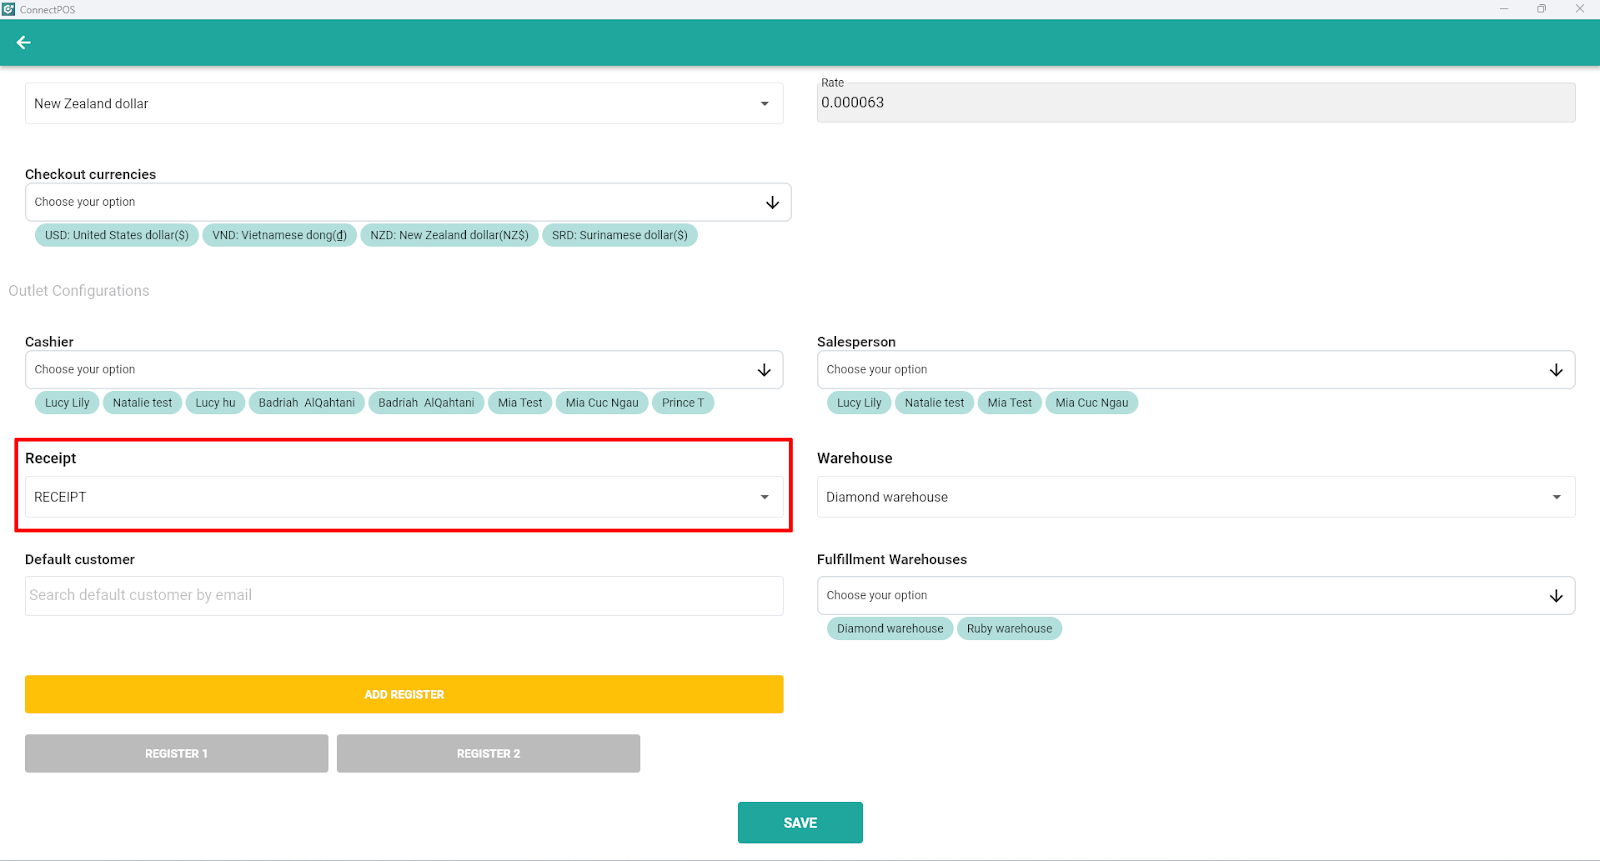
Assigning Templates to Outlets #
You can assign a receipt template to each Outlet. To assign receipt template to your outlet:
Manage > Outlet & Register > View Outlet Detail > Receipt > Select your template.
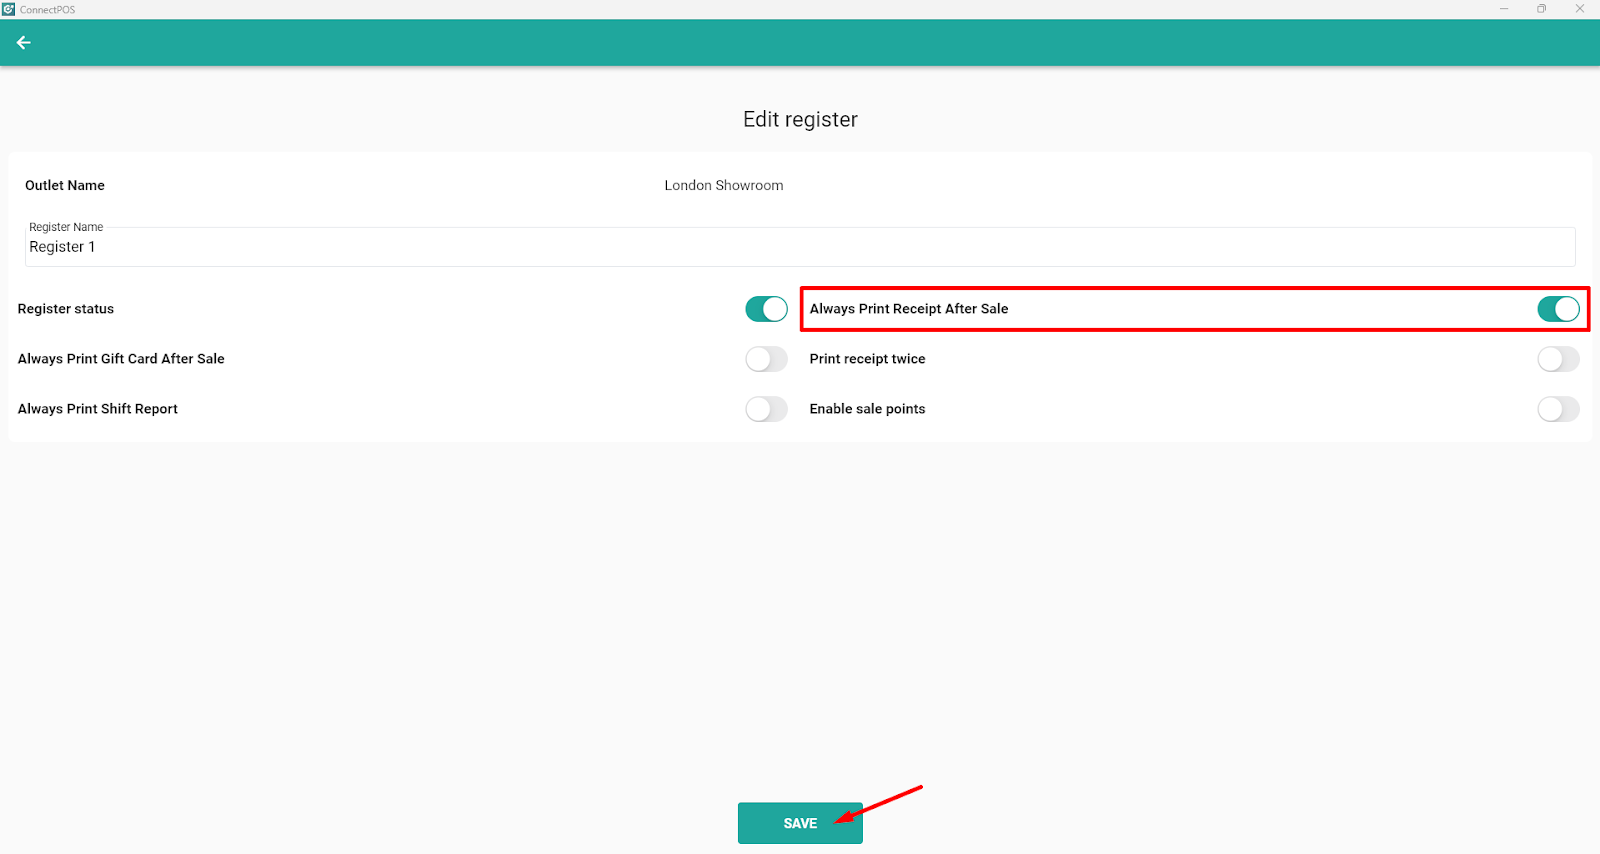
Auto-Printing Settings #
You can assign the receipt for auto-printing receipt from your outlet:

Please make sure that the setting “Always Print Receipt After Sales” is enabled.