Step 1: Connect the supplied charging cable to the reader and charge the device for a minimum of two hours prior to its initial use. Please ensure that only the charging cable provided in the reader package is used.
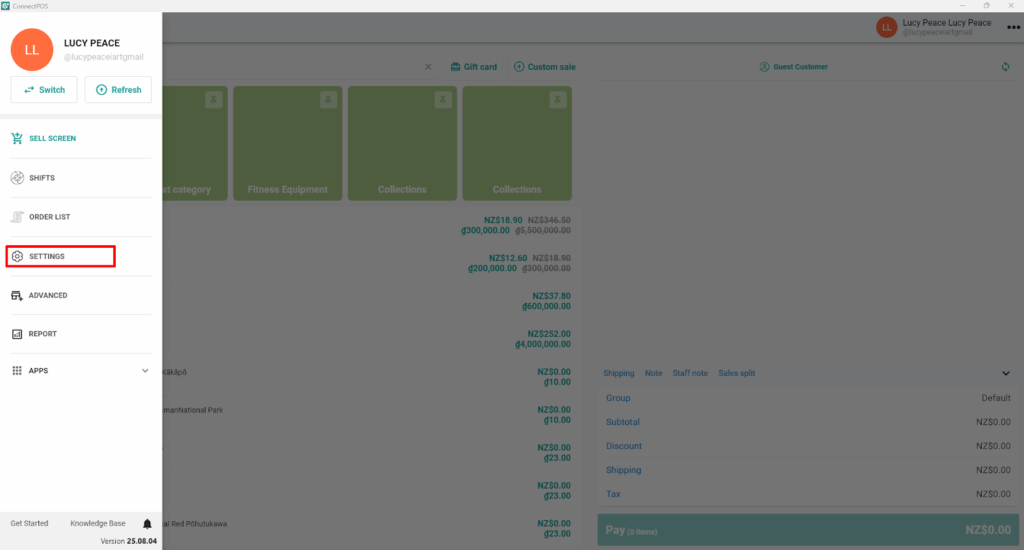
Step 2: Open the ConnectPOS application, then navigate to Settings > Integrated Payment > Authorize.net. Enable the Allow Amount Tendered option.
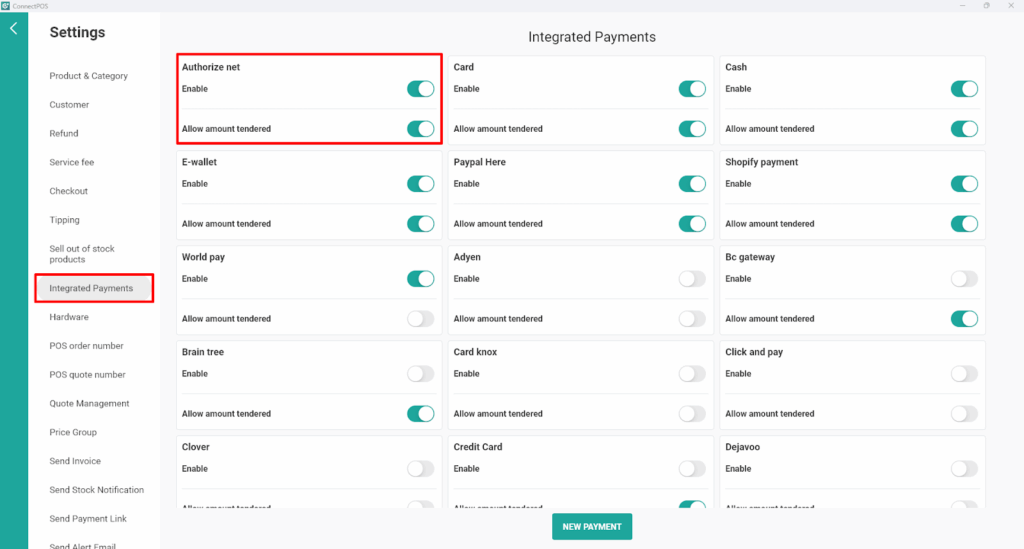
If Authorize.net is set as your default payment method, you may also select the Prioritize This Payment Method option.
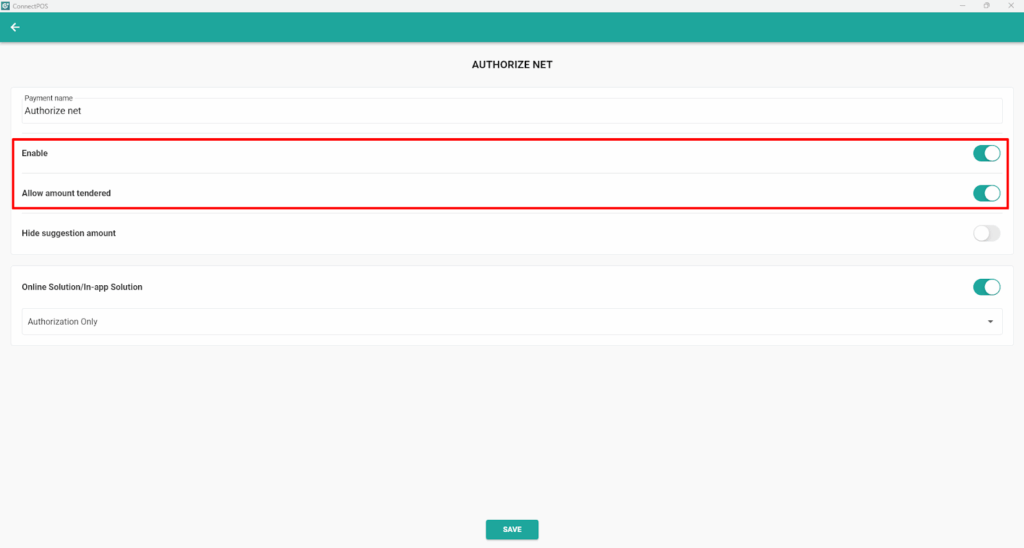
Step 3:
- Terminal/Card Reader Solution: Disable “Online Solution/In-app Solution” > Input “API Login Key” and “Transaction Key” > Select Gateway (Sandbox or Live” > Authorization w/ Auto Capture > Save.
- Online solution (input card information manually): Turn on “Online Solution/In-app Solution” > Save.
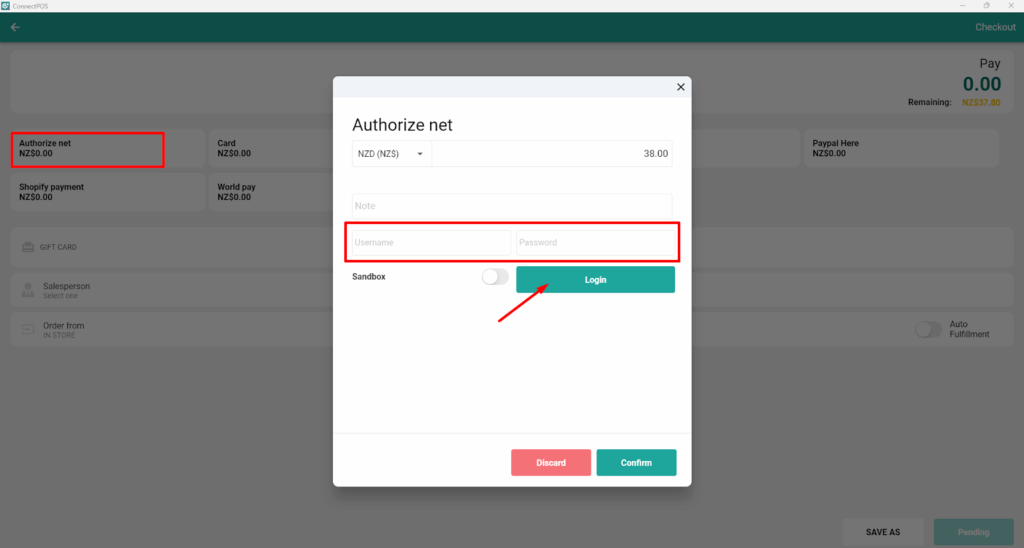
Then, back to the Sell Screen and create an order, during Checkout page > Select Authorize.net as the payment method > login your Authorize.net account.
This account will be saved locally on your device. If you login to another device, you need to relogin.