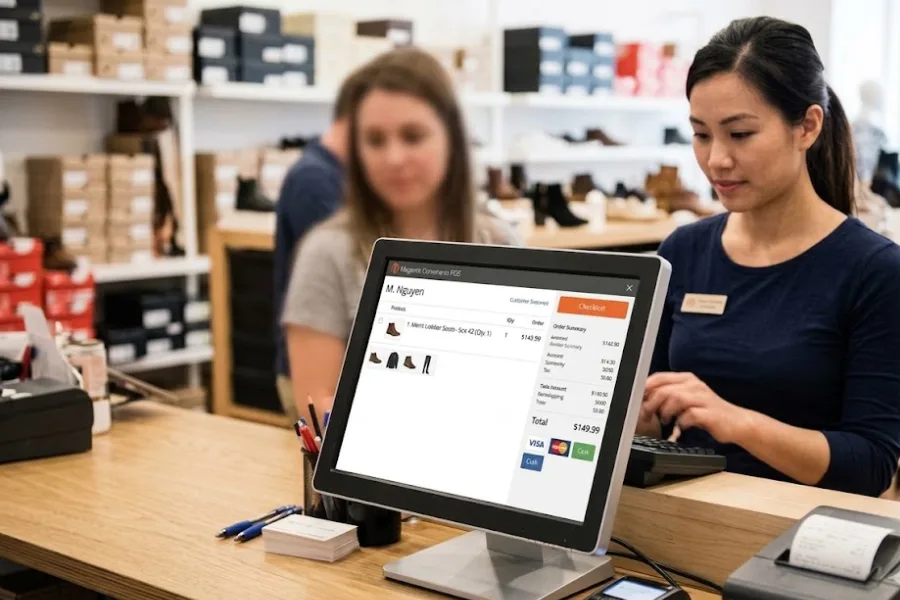
A boutique can have a working card terminal and still be nowhere near ready to open. Size variants may be wrong, barcodes may point to the wrong products, and opening stock may already be off. A well-prepared POS system for clothing store operations needs every part of that workflow tested together. In this ConnectPOS guide, we’ll cover the setup checks to finish before your first customer walks in.
Highlights
- Every sellable size and color needs a clean product, SKU, barcode, and opening-stock data.
- Test returns, exchanges, discounts, payments, and stock changes before opening, not just a basic sale.
- Plan the rollout several weeks ahead so catalog or hardware errors don’t become opening-day problems.
A Working Checkout Doesn’t Mean Your Boutique POS Is Ready to Open
Getting the terminal online feels like progress. Yet a clothing store can process payments perfectly and still have a broken product setup behind the counter.
Apparel makes POS setup harder because one design can turn into dozens of sellable records. Style, size, color, collection, supplier, cost, and barcode data all need to point to the correct variant. An apparel POS setup has to keep those records distinct once merchandise reaches the rack.
Take a shirt available in four colors and five sizes. Treating the whole style as one generic SKU leaves staff unable to tell whether the Medium Black shirt or Large White shirt was sold.
That mistake soon appears elsewhere. Stock counts drift, exchanges take longer, barcode searches return the wrong item, and product reports lose the detail buyers need.
Your POS system for clothing store operations should be ready before merchandise reaches the floor. Setup also needs breathing room. Trying to build a product matrix the night before opening is asking for trouble.
POS System For Clothing Store Setup Checklist Before Opening Day
Treat this as a working launch list, starting with account settings and ending with the first live transaction. Each stage should be completed before moving into day-one trading.
1. Set Up Store Settings, Payments, and Boutique Policies
Start with the basic rules that every transaction will follow. Wrong tax, register, receipt, or payment settings can turn a clean sale into a reconciliation problem later.
- Store and register details: Create the correct location and registers. Add the legal business name, address, currency, and time zone.
- Tax and receipt settings: Configure applicable taxes, receipt numbering, contact details, branding, and printed or digital receipt choices.
- Payment setup: Connect the correct settlement account. Activate cash, cards, split payments, and any other payment methods you plan to accept.
- Discount and gift rules: Add launch promotions, gift cards, store credit, and staff discount rules before training begins.
- Returns and exchanges: Define how regular, discounted, and clearance products will be handled. Test the refund path back to the original payment method where applicable.
Run a few small transactions after configuration. Check totals, taxes, receipts, refunds, and settlement records rather than trusting default settings.
2. Build the Product Catalog, Variants, SKUs, and Barcodes
Product data needs the most care in a clothing store. One bad parent product can spread the same mistake across dozens of size and color combinations.
A simple product structure could look like this:
- Style: Linen Oversized Shirt
- Colors: Black, White, Beige
- Sizes: XS, S, M, L
- Sellable variant: Black / M
- SKU: LS001-BLK-M
Each sellable combination should carry its own stock record. Add the brand, collection, category, supplier, cost, selling price, size, color, and other fields your team actually uses.
Set one SKU pattern before a bulk import. Staff should also be able to read it when a barcode is damaged or missing.
Barcodes serve another job. A scanner reads the code and retrieves the linked product record, so duplicate or misassigned codes can ring up the wrong garment.
Test a small label batch before printing hundreds. Scan the tag from the actual hanging garment and check the full variant, not just the parent style.
Barcode planning is becoming more relevant for new hardware purchases too. GS1 US has set Sunrise 2027 as the retail milestone for POS systems to process 2D barcodes alongside existing 1D codes. Retailers preparing new lanes are advised to assess scanner readiness rather than buying laser-only hardware that can’t read 2D codes.
Clean catalog data gives your POS system for clothing store a reliable base for checkout, stock counts, exchanges, and later replenishment.
3. Load Opening Inventory and Reconcile Every Variant
Opening stock becomes your first inventory baseline. If the starting number is wrong, every sale after it makes the gap harder to trace.
- Count by variant: Count each SKU rather than the parent style. Six Black Medium shirts and four Black Large shirts are two separate records.
- Separate stock states: Keep sellable, damaged, reserved, and non-sellable garments apart.
- Match physical and digital stock: Compare rack and stockroom counts against the POS before launch.
- Spot-check risk areas: Recount higher-value items, popular sizes, and styles with many color combinations.
- Scan during checks: Confirm that a barcode changes the quantity for the correct variant.
Catalog size changes the workload quickly. Shopify’s inventory count guidance estimates that counting 500 to 2,000 variants can take most of a day with two people. A catalog above 5,000 variants may take several days and three or more staff.
An inventory management software workflow only works well when the opening figures match what’s physically inside the boutique.
4. Install Hardware and Prepare for Connection Problems
Hardware should be tested where staff will actually work. A scanner that works beside the router may behave differently at a back counter or stockroom desk.
- Checkout equipment: Set up the main terminal or tablet, payment device, barcode scanner, receipt printer, and cash drawer.
- Label equipment: Connect the label printer and test the label size on real tags.
- Network coverage: Check Wi-Fi at the register, sales floor, stockroom, and any mobile checkout areas.
- Daily supplies: Keep chargers, paper, labels, and spare cables close to the register.
- Fallback steps: Document what staff should do if the scanner, printer, network, or payment device fails.
New boutiques may also use Mobile POS for stock checks or supported checkout flows away from a fixed counter. Test those devices on the shop floor before making them part of the sales routine.
Your fallback process should be short enough to follow during a queue. Staff shouldn’t be figuring out manual SKU searches for the first time after the internet drops.
5. Set Up Staff, Permissions, Customers, and Loyalty
Shared staff access may feel easier during setup, but it weakens transaction tracking. Give each employee an account or PIN and match access to the work they perform.
- Cashier access: Allow routine sales and standard customer actions.
- Manager controls: Limit refunds, voids, major discounts, inventory changes, and sensitive reports where needed.
- Register testing: Sign in under each role and test permissions on the real device.
- Customer profiles: Decide which customer details staff should collect without slowing checkout.
- Loyalty setup: Configure points, tiers, rewards, gift value, or store credit before staff training.
PCI Security Standards Council guidance says shared credentials should generally be prevented so actions can be tied to an individual user. That audit trail also makes transaction reviews easier when a refund or stock adjustment needs checking.
If loyalty is part of your launch plan, test the full Loyalty Program POS flow: customer lookup, points earning, reward redemption, and the final receipt.
6. Connect Ecommerce and Check Omnichannel Stock Flows
Selling online adds another place where product data can drift. A Medium Blue dress must refer to the same sellable variant across your ecommerce platform and store system.
This matters for apparel shoppers. McKinsey reported that 64% of European consumers bought apparel across a retailer’s channels, compared with 24% who shopped only in stores and 12% only online.
Test your connected POS system for clothing store across the workflows customers will actually use:
- Product mapping: Match SKUs, sizes, colors, prices, and product status.
- Stock synchronization: Sell one item in-store and check the online quantity.
- Online order lookup: Confirm store staff can find supported ecommerce orders.
- Pickup workflows: Test buy online, pick up in store where available.
- Cross-channel returns: Check how an online order returns to store stock.
- Stock adjustments: Confirm that changing quantity in one channel doesn’t create false availability elsewhere.
An ecommerce POS connection should be tested before launch. SKU cleanup after orders start flowing is much harder.
7. Run a Full Dress Rehearsal Before the First Customer Arrives
One successful test sale proves very little. Staff need to rehearse the awkward transactions too, because those are the ones that expose setup gaps.
Test the main boutique workflows
| Workflow to test | Scenarios to include | What to verify |
| Everyday checkout | Regular sale, multi-item purchase, cash, card, split payment | Price, tax, payment total, receipt, stock deduction |
| Promotions and gift value | Discounted item, gift card purchase, redemption | Discount rules, balance, reporting |
| Returns and exchanges | Return with receipt, refund, Medium-to-Large exchange | Refund amount, payment route, correct variant stock |
| Product lookup problems | Manual SKU search, unreadable barcode, sold-out size | Staff can locate the right product |
| Transaction corrections | Void or cancelled transaction | Stock and payment records return correctly |
Returns deserve real testing. NRF estimates that retailers expected 15.8% of annual sales, worth $849.9 billion, to be returned in 2025. A return workflow that looks minor during setup can become regular counter work once trading starts.
Check each transaction against the right SKU and size-color record. Review discounts, refunds, tender types, and staff activity in reports, then open and close the register once.
Run the final 30 to 60 minute opening check
- Check that the internet and store network are working.
- Make sure all POS devices are charged and powered.
- Confirm the correct store and register are selected.
- Check that the latest product catalog has synchronized.
- Scan several real garment labels.
- Confirm the payment terminal is connected.
- Print a test receipt.
- Test the cash drawer if you accept cash.
- Confirm staff PINs and permissions.
- Check that opening inventory is visible.
- Enter opening cash where required.
- Make sure payments are in live mode.
- Complete one final transaction before customers arrive.
Fix anything that fails here before merchandise reaches the floor or customers reach the register.
Give Your Boutique Enough Time to Fix What Testing Finds
Work backward from opening day. Apparel catalogs punish rushed setup because every extra color and size creates another record that needs checking.
| When | What to finish | Why it matters |
| 4+ weeks before opening | Select the POS, confirm needs, order hardware, decide integrations | Delays here hold up later setup |
| 2 to 3 weeks before | Configure settings, variants, SKUs, barcodes, payments, staff, customer flows | Most apparel-specific setup happens here |
| Around 1 week before | Install devices, load final inventory, train staff, run tests | Problems still have time to be fixed |
| 1 to 2 days before | Reconcile stock and repeat high-risk workflows | Staff should see the correct opening stock |
| Opening morning | Run final checks and one successful transaction | Small errors are easier to fix before trading |
The timing closely follows Shopify’s current POS launch checklist. Shopify recommends starting at least four weeks before opening for smaller rollouts, configuring the admin two to three weeks ahead, and setting up devices about one week before launch.
Give yourself extra time when the assortment includes hundreds or thousands of variants. Each extra SKU brings another barcode, stock count, and possible mismatch.
Common POS Setup Mistakes That Show Up After the Doors Open
Small setup shortcuts tend to reappear during busy periods. Watch for these before the first trading day:
- One SKU for several variants: Staff lose reliable size and color counts.
- Labels printed too early: Dirty product data turns into a relabeling job.
- Opening stock entered without counting: Your inventory starts wrong before the first sale.
- Only happy-path testing: Returns, exchanges, refunds, and voids stay untested.
- Shared staff logins: Approvals and adjustments become harder to trace.
- Poor ecommerce SKU mapping: Online and store stock start drifting apart.
- Training left until launch: Basic questions become checkout delays.
- No connection fallback: A Wi-Fi problem can stop a team that only knows the normal flow.
A POS system for clothing store should be tested as a set of connected workflows. Ringing up one clean transaction tells you almost nothing about the rest.
When a Basic Boutique POS Starts Creating More Manual Work
A basic setup may work well for one store with a small catalog. The pressure changes when size-color combinations grow, ecommerce orders enter the same stock pool, or staff start reconciling channel data by hand.
ConnectPOS is built for apparel retailers dealing with those heavier workflows. Its apparel and mobile POS materials cover variant management, inventory tracking, staff access, connected channels, and reporting across retail operations.
For a boutique at that stage, daily work starts to depend on a few core tools:
- Size and color matrix: Keep apparel variants distinct inside one product structure.
- Real-time inventory synchronization: Keep store and ecommerce stock aligned as transactions occur.
- Mobile POS: Let staff handle supported stock and checkout tasks away from the counter.
- Staff role management: Assign access based on each employee’s responsibilities.
- Flexible fulfillment: Support connected pickup, shipping, and cross-channel order flows.
- Real-time reporting and analytics: Track sales, product activity, inventory, and staff records after launch.
These tools become useful when manual reconciliation starts eating into store time. The point is a cleaner operating flow as your boutique adds channels, stock, or locations, rather than another layer staff must maintain.
FAQs: Setting Up a POS System for a Clothing Store
1. How far before opening should I set up a POS system for a clothing store?
Start around four weeks before launch for a smaller boutique. Hardware ordering should happen early, followed by catalog setup, inventory loading, staff training, and transaction testing.
2. Should every clothing size and color have its own SKU?
Yes, each sellable variant should have a distinct internal identifier. Separate SKUs let you track the exact size and color sold, returned, transferred, or counted.
3. What POS hardware does a new clothing boutique need?
Most boutiques need a POS terminal or tablet, card reader, barcode scanner, receipt printer, and reliable network. A cash drawer and label printer may also be needed depending on store workflows.
4. How should I test a clothing store POS before opening day?
Test real sales, discounts, returns, refunds, exchanges, gift cards, stock changes, staff permissions, and register closing. Run problem scenarios too, including unreadable barcodes and connection loss.
5. Does a new boutique need an omnichannel POS from day one?
A physical-only boutique may start without connected ecommerce flows. If online sales, store pickup, shipping, or a second location are already planned, build clean product and SKU structures early so you don’t have to rebuild them later.
Final Thoughts
A strong opening starts long before the first shopper reaches checkout. Variant data, SKUs, barcodes, opening inventory, hardware, staff access, returns, and channel connections all need testing as one retail workflow. Your POS system for clothing store should reflect what happens on the sales floor, not just process a card payment. Finish setup early enough to fix mistakes before launch. If you need help mapping those workflows to your boutique, chat with us to discuss your store setup.
Chat with our team